

- Create your Tensor9 account and set up a Tensor9 BYOC control plane in your AWS account.
- Create an app and bind an AWS CloudFormation stack as its origin stack. In this guide, we use Nginx as an example app.
- Try the customer click-to-install experience and release your app to the customer’s appliance.
- Explore your control plane in the AWS Console that allows you to observe and operate all customer appliances.
- Deploy code changes and monitor them rolling out to customer appliances.
Prerequisites
- A Google account to sign up for Tensor9.
- A CloudFormation template that creates your app’s origin stack and runs your container. This guide uses Nginx as the example app; if you would like Tensor9’s sample Nginx template, email [email protected].
-
Create an AWS account for Tensor9 BYOC. We will refer to this as the Tensor9 BYOC AWS account.
Important:
- Your Tensor9 BYOC AWS account should be a dedicated AWS account used only for Tensor9 BYOC. This reduces the risk of conflicts between your app deployed in a Tensor9 BYOC appliance and any other software, infrastructure, or resources you might have in a general-purpose AWS account.
- Tensor9 BYOC sets up your control plane in the AWS
us-west-2(US West, Oregon) region. Other regions are not available yet.
- A second AWS account to simulate your first customer.
Launch an AWS EC2 instance
To use the Tensor9 CLI, you need to set up an AWS EC2 instance.- Go to your AWS EC2 dashboard.
- Select the US West (Oregon) region,
us-west-2. Tensor9 BYOC control planes run only inus-west-2today. - Click the Launch instances button.
- Provide a name for your new instance.
- Under Application and OS images, choose your desired configuration.
- Select a new or existing Key pair to log in via SSH, if needed. (You can alternatively access your instance via Session Manager.)
- Review the Network settings section. These can be left at their defaults in most environments, but you can customize them, if needed.
- In the Configure storage section, increase your storage to at least 20GB.
- Under Advanced details, select an IAM instance profile that has the AdministratorAccess policy assigned to the role. If you do not have such a profile:
- Click the Create new IAM profile link, then click the Create role button.
- Select EC2 as Service or use case.
- Search for and select AdministratorAccess to add the policy to the role.
- Name the role and click Create Role.
- Return to your Launch an instance tab and select the new instance profile that you just created.
- Click Launch instance.
Install the Tensor9 CLI
- Connect to your new AWS EC2 instance.
- Install the AWS CLI.
- Install the Tensor9 CLI by following Install tensor9 CLI.
Create your account and control plane
- On your own computer, follow Get a Tensor9 API key to sign up and copy your API key.
- In your session on the EC2 instance, export your API key and set up your control plane in your new AWS account (about 10 minutes):
Create an app and prepare a Docker container
- Create a new Tensor9 BYOC app. As an example, we use Nginx:
tensor9 app create -name nginx-example -displayName "Nginx example app"
Note: The length of the displayName field must be 32 characters or fewer.
- Install Docker, if it is not already installed:
sudo apt install docker.io
- Verify that Docker is running:
sudo docker version
- Prepare a docker container with your app. In this example, we download Nginx:
sudo docker pull nginx
- Push your container to a repository in the Elastic Container Registry (ECR) in your Tensor9 BYOC AWS account. For more information and for a list of push commands, go to your list of private repositories, click a repository link, and then click the View push commands button.
build step, but because you are pulling down an existing Docker container for Nginx, you do not need to complete the build step. The build step is only required if you are building your own container. If you are building your own container, make sure the container supports the linux/amd64 architecture.
Set up a CloudFormation origin stack
Now you will create a new CloudFormation stack from your CloudFormation template.- Go to the AWS CloudFormation Console in your region.
- Click the Create stack button, then click With new resources.
- Click Choose an existing template, then click Upload a template file. Upload your CloudFormation template, then click Next.
- Enter a stack name for your new stack (32 characters or fewer, such as
t9-quickstart-origin-stack), then click Next. - On the Configure Stack Options screen, you can leave all settings at their defaults. Check the checkbox next to I acknowledge that AWS CloudFormation might create IAM resources and click Next.
- Review all settings, then click the Submit button to create your stack. The stack takes several minutes to be created.
- After your new stack is created, click on its name to find its Amazon Resource Name (ARN). The ARN of the stack shows as the Stack ID.
- Bind your stack as the new origin stack:
Testing the customer install process
As a vendor providing services to customers, you can test your environment by going through the process of installing your app from the perspective of a customer.- Create a form factor that lets customers install your app in AWS:
- Create a setup link for your simulated customer:
acme-corp if it does not exist yet and prints the customer’s setup link.
- Log into the AWS console of your second AWS account as your simulated customer. Verify that you have admin permissions.
- Visit the setup link in the same browser window that you used to log into the AWS console as a simulated customer. Follow the setup wizard to choose the environment, then download and apply the infrastructure templates in the customer account. The customer installation guide describes each step.
- View the output of
tensor9 reportto determine when the customer’s appliance is ready for a release. While the appliance is creating,tensor9 reportdisplays output such as:
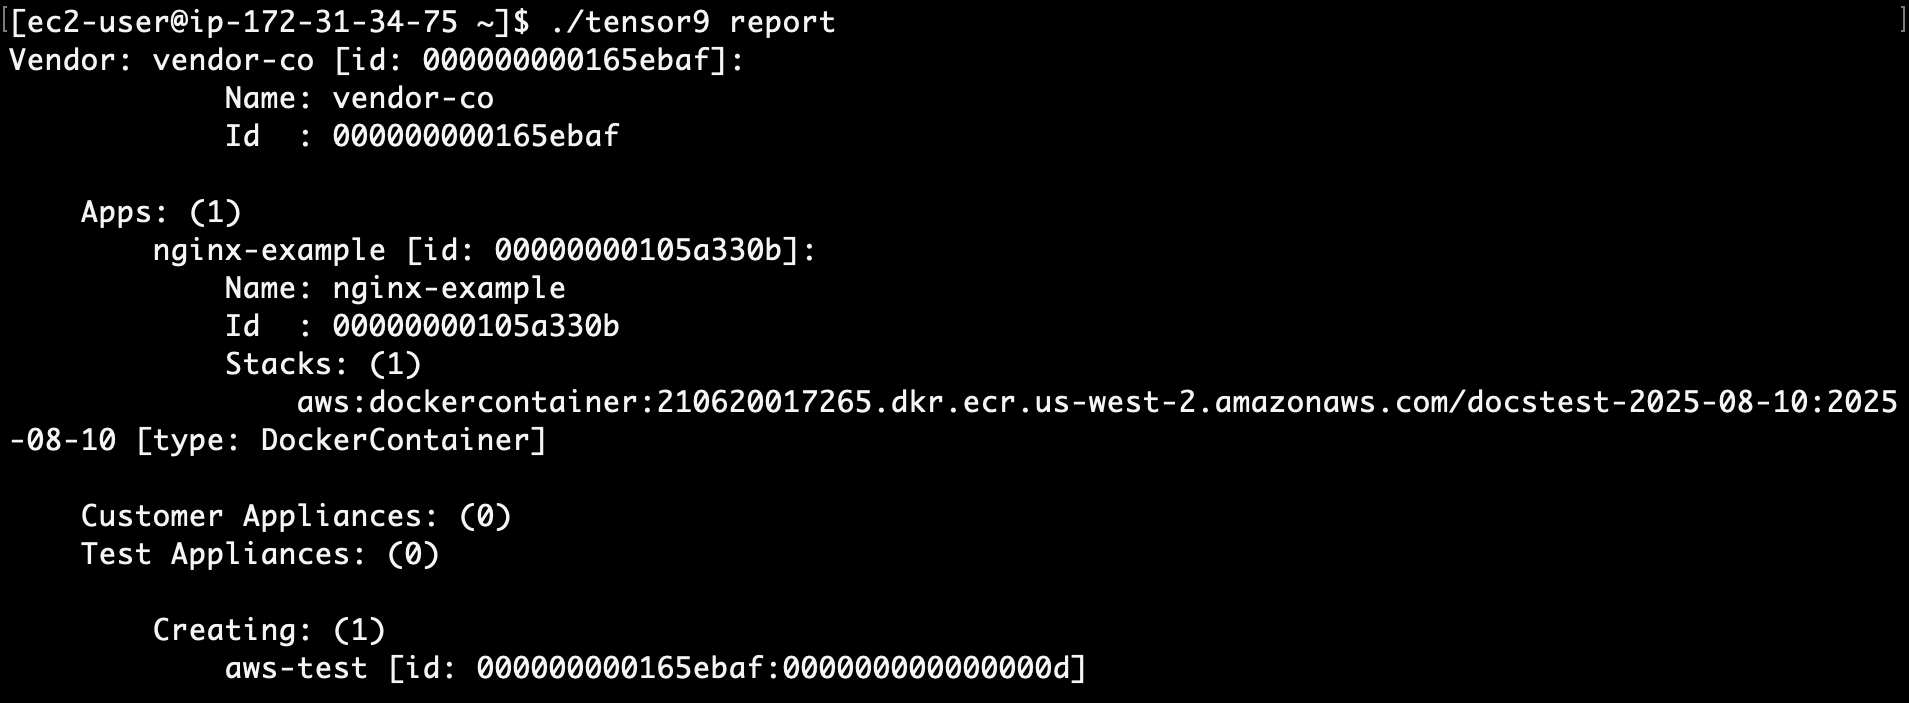
tensor9 report displays output such as:
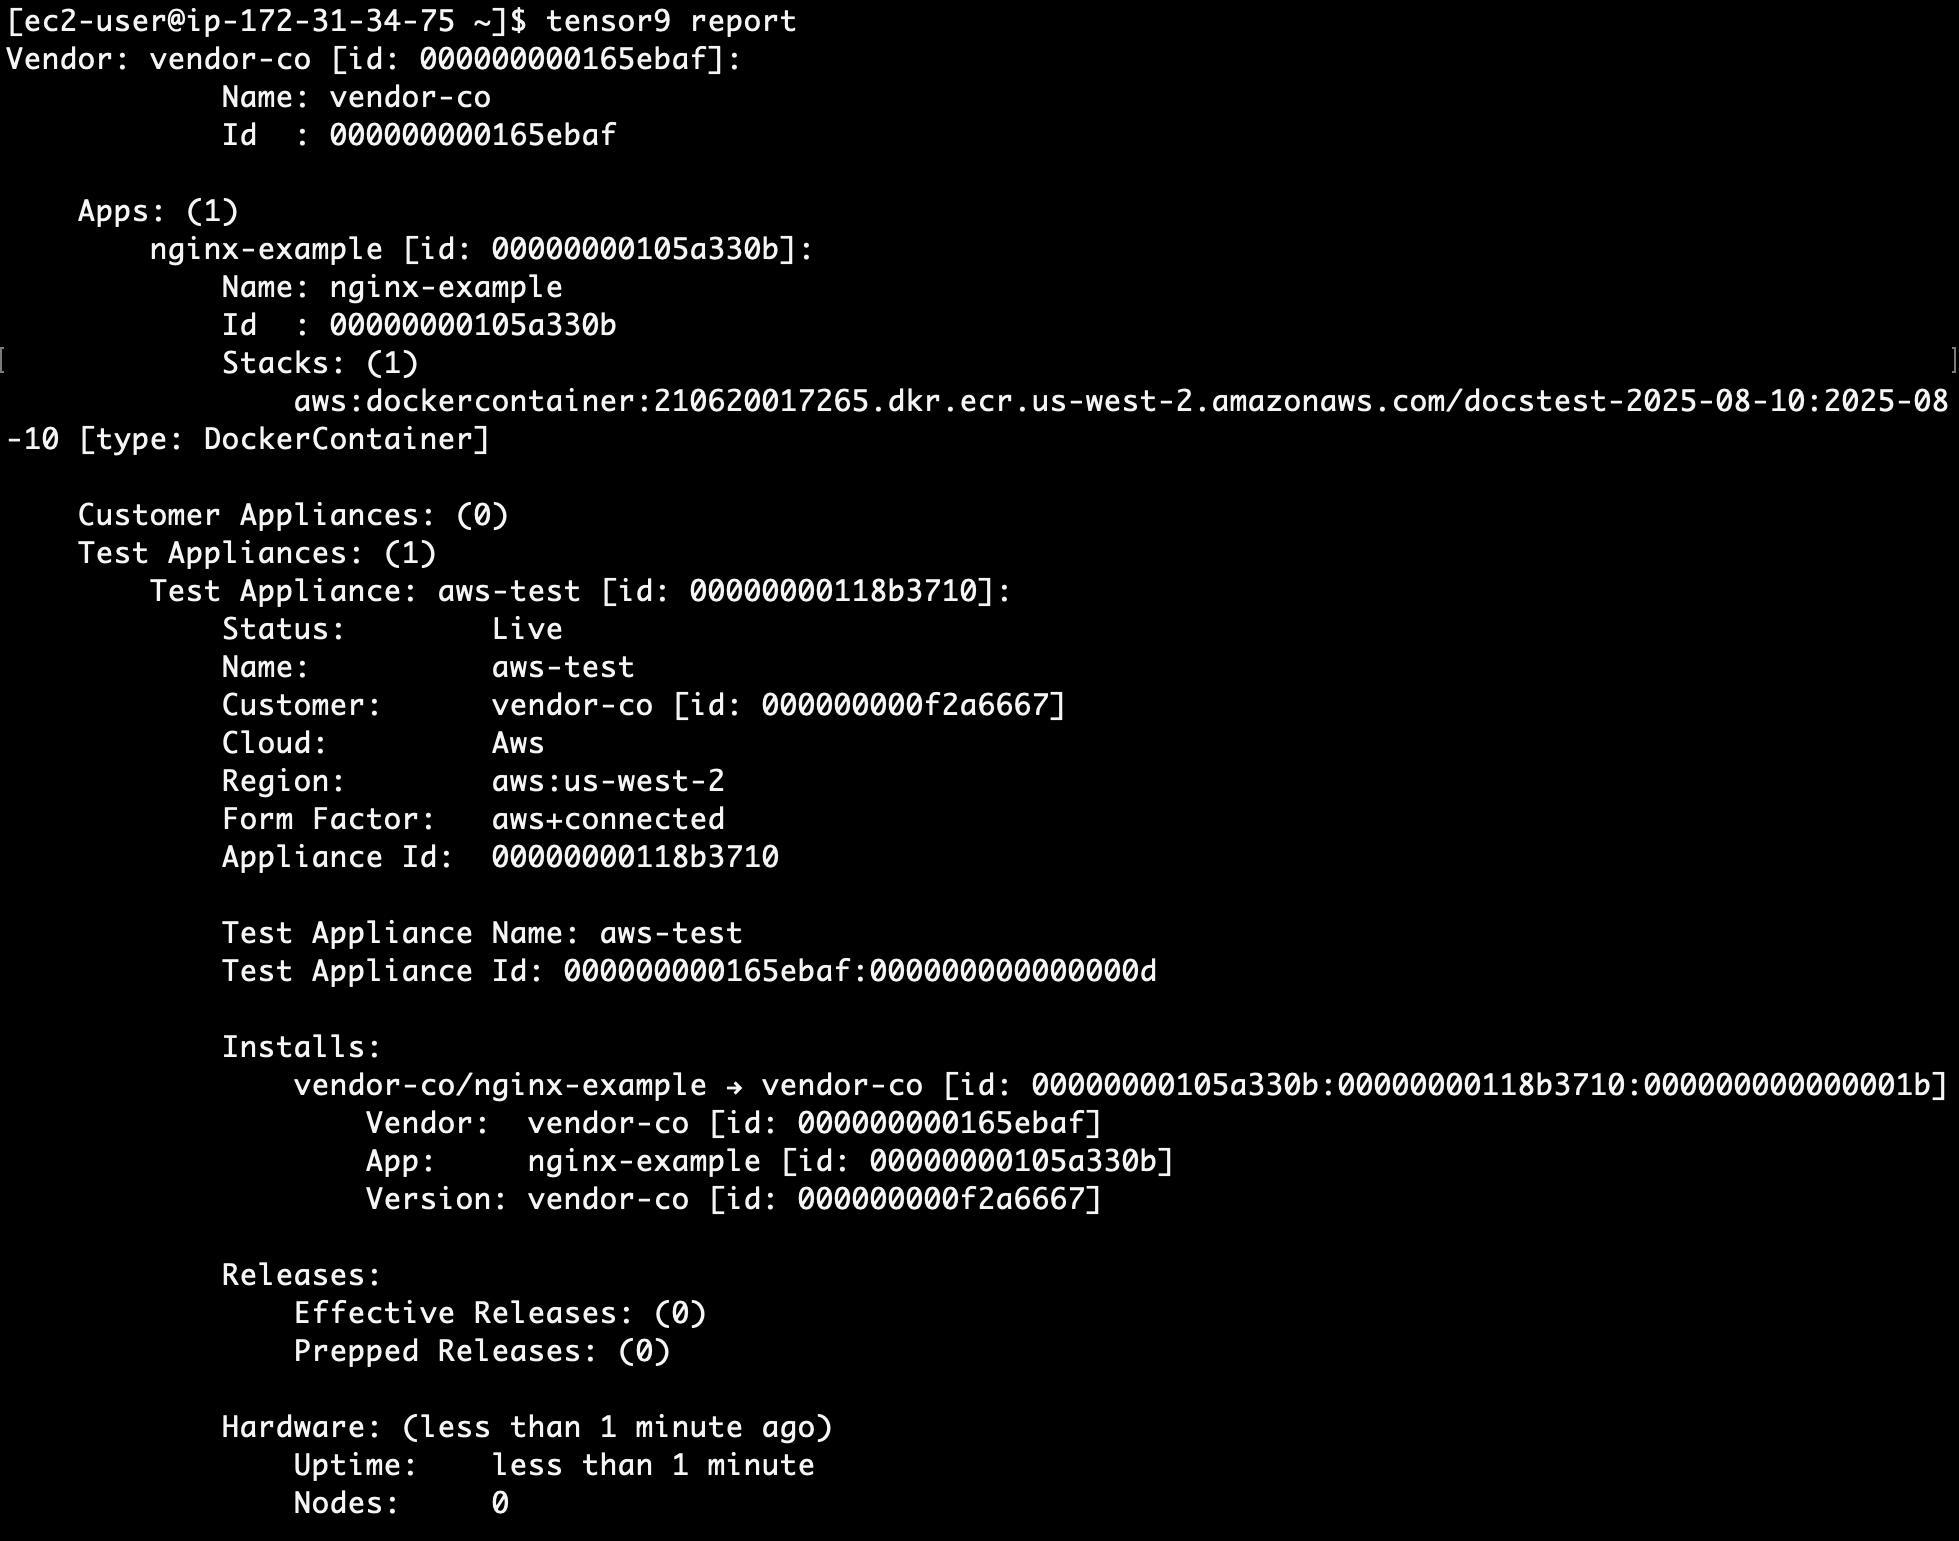
- Create a release for your customer:
Explore your control plane in AWS
AWS is your control plane for all your customer appliances. You can view the status of your customer appliances in AWS.- Visit the deployment stack for a customer appliance by searching for your customer name in the AWS CloudFormation console.
- Click the link to the customer app deployment stack, then click Events and Timeline View. This view shows the deployment timeline of your stack to the customer’s appliance.
- Click the Resources tab, search for “service”, then click the Service link to view the ECS cluster for your customer. Here you can explore deployments, see which containers are running, and view logs and metrics.
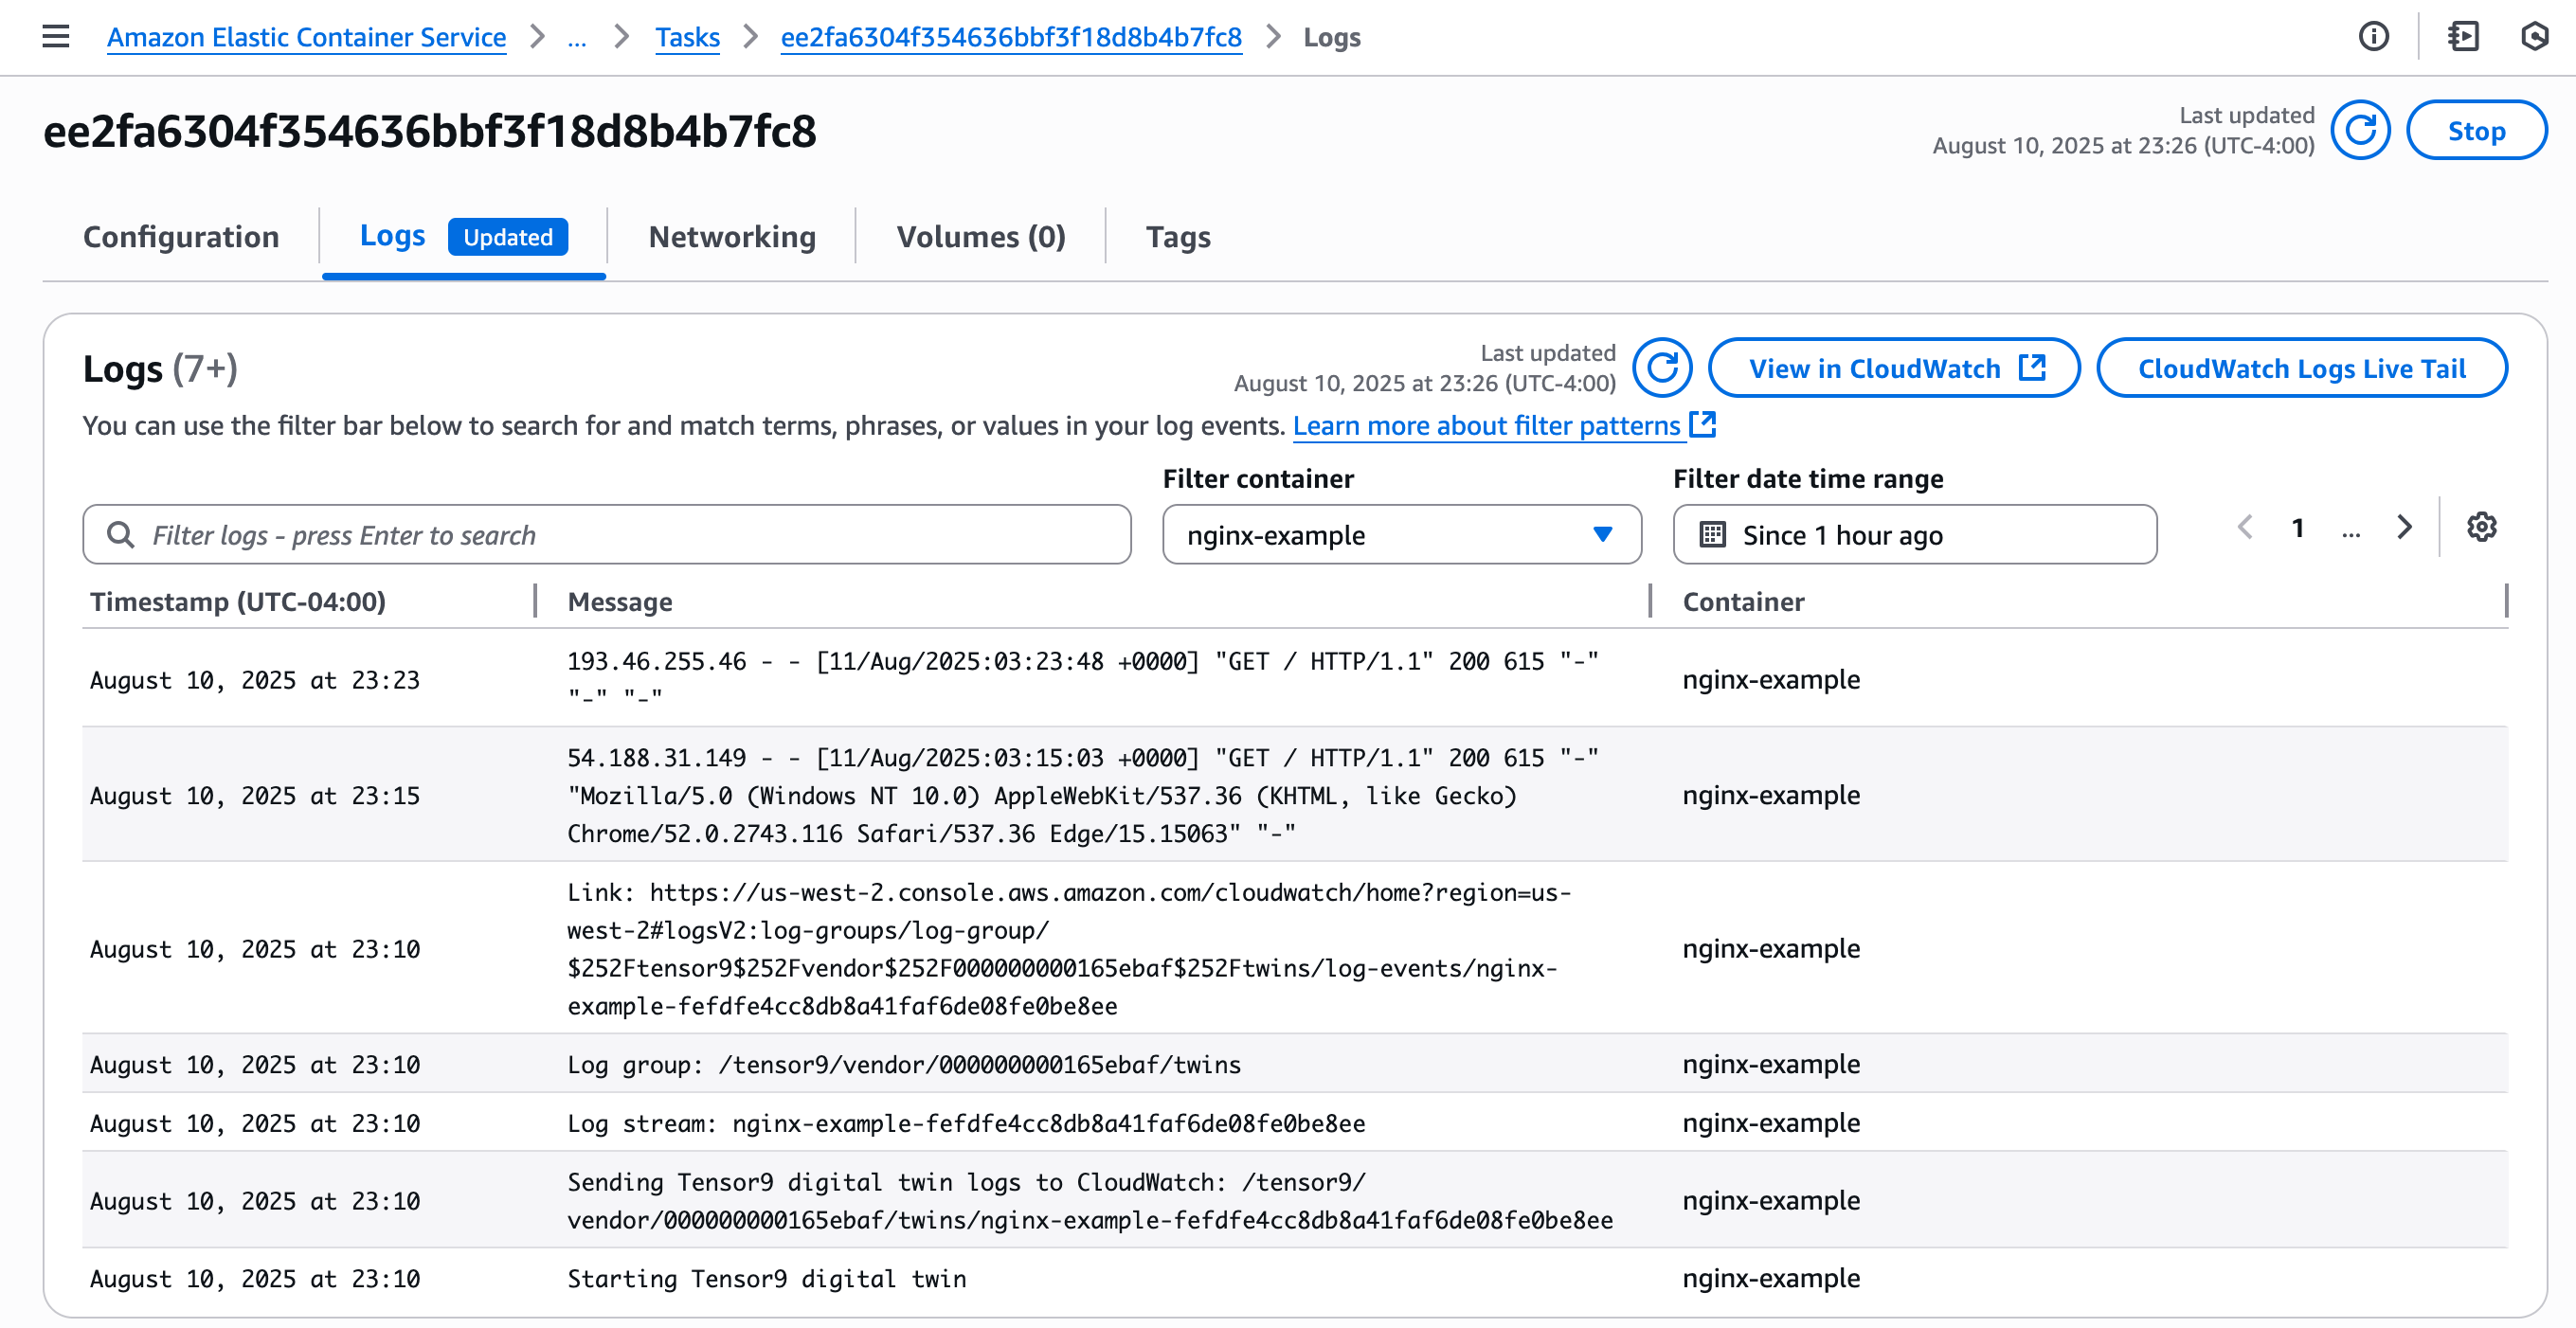
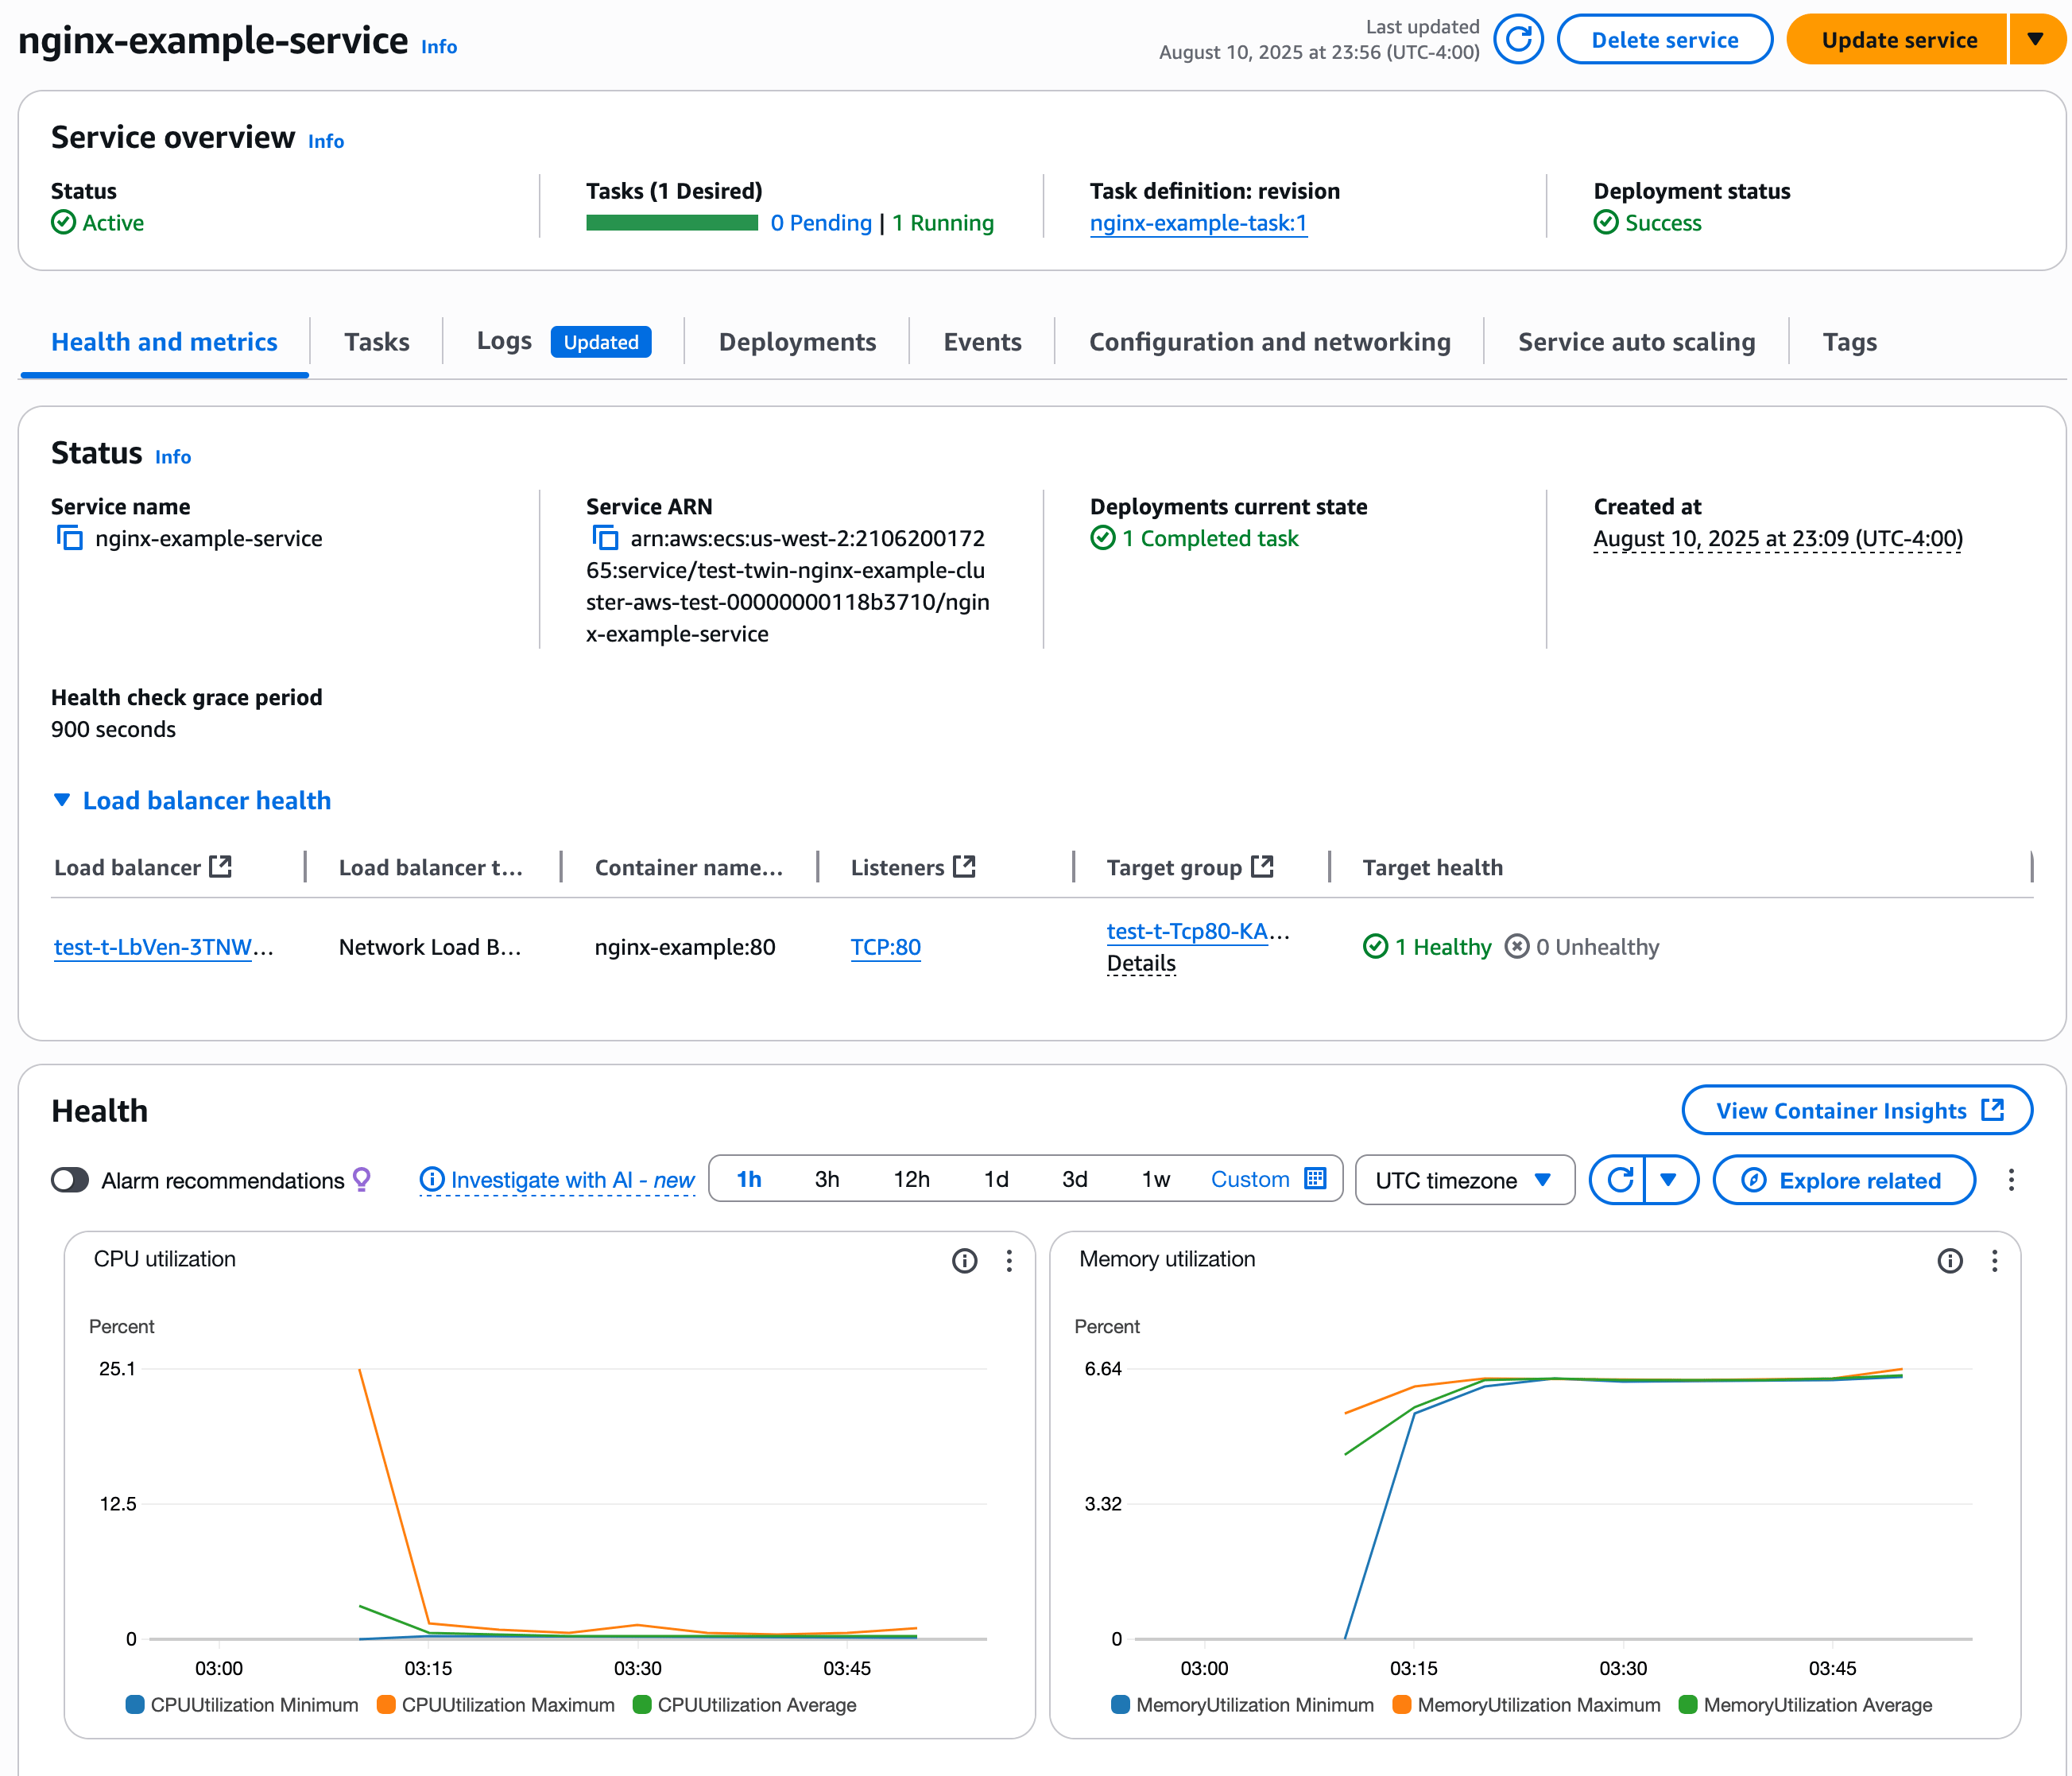
- Run
tensor9 reportand look for a line labeled DnsNameForLbAppliance in the Customer Appliances section of the output. This is the DNS name for the customer appliance. For example,nginx--LbApp-tAUAT8tDV5hn-0c7199c912e8827d.elb.us-west-2.amazonaws.com. - Visit
http://<DNS_NAME_FOR_LB>:80to use Nginx as if you were the customer.
Release a code change
At any time, you can make a code change, build the latest container, and push it to Elastic Container Registry in your Tensor9 BYOC AWS account. You must use a Docker image tag that is different from the tag you originally used to deploy the container. Important: Verify that your container supports the linux/amd64 platform.- Prepare your updated Docker container, then tag the container and push it to your ECR repository just as you did in the Create an app and prepare a Docker container section.
- Modify the CloudFormation stack template that you used in the Set up a CloudFormation origin stack section so that it has the URI of the new container you just pushed to your ECR repository.
- Go to your AWS CloudFormation console and select your Tensor9 BYOC origin stack, then click Update stack > Make a direct update. On the next screen, click Replace existing template. Select the template you modified in the previous step, then click the Next button.
- On the following screen, make any modifications that are appropriate for your environment, then click Next. On the Configure stack options screen, check the checkbox next to I acknowledge that AWS CloudFormation might create IAM resources, then click Next.
- On the Review screen, verify that all the changes look correct. When you are ready, click the Submit button. The stack takes several minutes for update to complete.
- Retire the current release:
- Create a new release:
-vendorVersion than the currently deployed app.
- Inspect your customer’s deployment stack in the AWS CloudFormation console to find the ECS cluster. A recent blue or green deployment for your change appears. The old software will not be turned off until the new software is up and passing health checks.
- Run
tensor9 reportand look for a line labeled DnsNameForLbAppliance in the Customer Appliances section. This is the DNS name for the customer appliance. For example,nginx-LbApp-6SOn9F6auFHS-bb813efec3dd0c2c.elb.us-west-2.amazonaws.com. - Visit
http://<DNS_NAME_FOR_LB>to test Nginx on the customer appliance and verify that your code changes were applied.
Clean up
When you finish with this guide, remove what you created. You can do the following yourself today:- Unbind the CloudFormation stack from your app, so that no new releases are made from it:
- After unbinding, delete the origin stack that you created in the AWS CloudFormation console, delete the images you pushed to your ECR repository, and terminate the EC2 instance you launched for this guide, if you no longer need them.
tensor9 whoami reports, and the app and customer names. Do not delete control plane resources from your AWS account by hand.